対象読者: WSL2 + Docker で PHP 開発中で、Slim 4 の具体的な API 実装例を最小構成で確認したい方
本記事は、既存記事への依存を置かずに、WSL2 + Docker 環境で Slim 4 の最小 JSON API を作る手順をまとめたものです。
目的は「GET /health と POST /api/greetings を動かし、失敗時も JSON で返す」ことです。
確認は curl を主線にします。
DB、認証、OpenAPI、テストは扱いません。
前提環境
- Windows 11
- WSL2(Ubuntu)
- VS Code(Remote - WSL)
- Docker Desktop(WSL連携有効)
以降のコマンドは、特記がない限り WSL 側ターミナルで実行します。
サービス名は app に固定しています。
1. ゴールと非対象
この記事で到達する状態:
- Slim 4 を最小構成で導入できる
GET /healthで{"status":"ok"}を返せるPOST /api/greetingsで{"message":"Hello, Taro!"}を返せるname未指定や存在しないパスでも HTML ではなく JSON エラーを返せる
この記事で扱わない内容:
- DB 接続や永続化
- 認証・認可
- OpenAPI / Swagger
- Monolog などのログ出力実装
- PHPUnit や結合テスト
- カスタムミドルウェアの本格設計
2. 新規デモ環境を作成して起動する
WSL 側のシェルで作業します。
Windows 側から始める場合は wsl で Ubuntu に入り、以下を実行してください。
# Windows側から始める場合のみ実行
# wsl
mkdir -p ~/projects/slim4-minimal-json-api-demo
cd ~/projects/slim4-minimal-json-api-demo
mkdir -p docker/php config app public src/Action src/Service src/Handler
code .
compose.yml を作成します。
services:
  app:
    build:
      context: .
      dockerfile: docker/php/Dockerfile
    working_dir: /workspace
    volumes:
      - ./:/workspace
    ports:
      - "8080:8080"
    command: ["sleep", "infinity"]
docker/php/Dockerfile を作成します。
Composer が配布アーカイブを展開できるように、ここでは unzip も入れておきます。
FROM php:8.5-cli

RUN apt-get update \
    && apt-get install -y --no-install-recommends unzip \
    && rm -rf /var/lib/apt/lists/*

COPY --from=composer:2 /usr/bin/composer /usr/bin/composer

WORKDIR /workspace
composer.json を作成します。
この時点で autoload.psr-4 に src/ を登録しておくと、後続の Action / Service / Handler を素直に読み込めます。
{
  "name": "example/slim4-minimal-json-api-demo",
  "type": "project",
  "require": {},
  "require-dev": {},
  "autoload": {
    "psr-4": {
      "App\\": "src/"
    }
  }
}
起動して確認します。
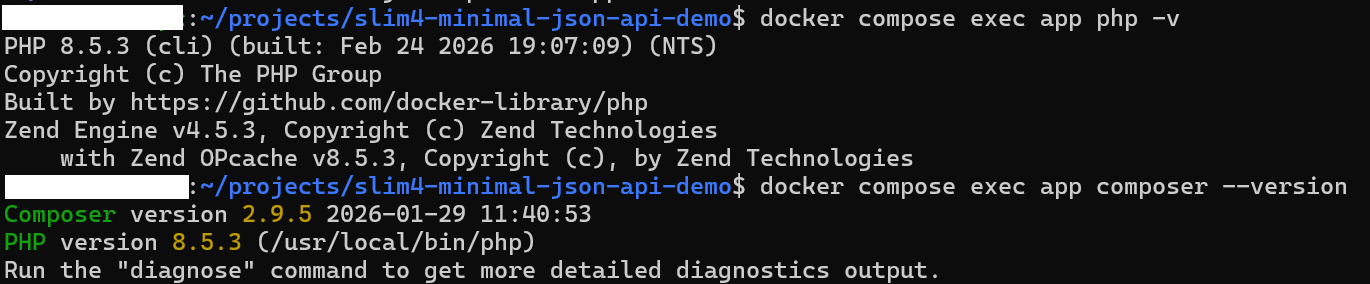
docker compose up -d --build
docker compose exec app php -v
docker compose exec app composer --version
この段階では、コンテナは sleep infinity で起動したままにします。
HTTP サーバーは 3章で手動起動します。
詰まり時:
- コンテナが起動しない:
docker compose logs app - Composer が見つからない: Dockerfile の
COPY --from=composerを見直し、docker compose up -d --buildを再実行
3. Slimを導入して最小起動コードを作る
まずは Slim と関連パッケージを導入します。
バージョンを固定しておくと、環境ごとの差分が少なくなり、再現しやすくなります。
docker compose exec app composer require slim/slim:^4.15 slim/psr7:^1.8 php-di/php-di:^7.1config/container.php を作成します。
この段階では、container ベースで起動する土台だけを置きます。
<?php
declare(strict_types=1);

use DI\ContainerBuilder;

return static function (ContainerBuilder $containerBuilder): void {
};
public/index.php を作成します。
<?php
declare(strict_types=1);

use DI\ContainerBuilder;
use Slim\Factory\AppFactory;

require __DIR__ . '/../vendor/autoload.php';

$containerBuilder = new ContainerBuilder();
(require __DIR__ . '/../config/container.php')($containerBuilder);
$container = $containerBuilder->build();

$app = AppFactory::createFromContainer($container);

$app->addBodyParsingMiddleware();
$app->addRoutingMiddleware();
$app->addErrorMiddleware(true, true, true);

(require __DIR__ . '/../app/routes.php')($app);

$app->run();
app/routes.php を作成します。
最初は GET /health だけを定義します。
<?php
declare(strict_types=1);

use Psr\Http\Message\ResponseInterface;
use Psr\Http\Message\ServerRequestInterface;
use Slim\App;

return static function (App $app): void {
    $app->get('/health', function (ServerRequestInterface $request, ResponseInterface $response): ResponseInterface {
        $response->getBody()->write(json_encode([
            'status' => 'ok',
        ], JSON_UNESCAPED_UNICODE | JSON_UNESCAPED_SLASHES));

        return $response->withHeader('Content-Type', 'application/json');
    });
};
別ターミナルを開き、HTTP サーバーを手動起動します。
このコマンドは起動したままになるので、止めるまではそのターミナルを閉じずに置いてください。
docker compose exec app php -S 0.0.0.0:8080 -t public public/index.phpAppFactory::createFromContainer() を使うことで、後続の Action や Service を同じ container で解決できます。
addRoutingMiddleware() を先に置くと、404 / 405 などのルート関連エラーを error middleware 側で扱いやすくなります。
また、addBodyParsingMiddleware() は 4章以降の JSON リクエスト読込に必要です。
詰まり時:
Class not foundが出る:docker compose exec app composer dump-autoloadhttp://localhost:8080へつながらない:php -Sを起動したターミナルが生きているか確認CallableResolver::bindToContainerを含む 500 が出る: route closure にstaticを付けている場合は外す
コードのポイント
① ミドルウェアの追加順(public/index.php)
$app = AppFactory::createFromContainer($container);

$app->addBodyParsingMiddleware();
$app->addRoutingMiddleware();
$app->addErrorMiddleware(true, true, true);
AppFactory::createFromContainer() で DI コンテナと Slim アプリを接続する。ミドルウェアは addBodyParsingMiddleware → addRoutingMiddleware → addErrorMiddleware の順で登録する必要があり、addRoutingMiddleware が先にあることで 404 / 405 などのルーティングエラーを error middleware 側で補足できる。
4. POST /api/greetings を routing + DI で実装する
次に、Action と Service に責務を分けて POST /api/greetings を追加します。
src/Service/GreetingService.php を作成します。
<?php
declare(strict_types=1);

namespace App\Service;

final class GreetingService
{
    public function build(string $name): string
    {
        return "Hello, {$name}!";
    }
}
src/Action/CreateGreetingAction.php を作成します。
この段階では、まず成功系を通すための最小実装にします。
<?php
declare(strict_types=1);

namespace App\Action;

use App\Service\GreetingService;
use Psr\Http\Message\ResponseInterface;
use Psr\Http\Message\ServerRequestInterface;

final class CreateGreetingAction
{
    public function __construct(private GreetingService $greetingService)
    {
    }

    public function __invoke(ServerRequestInterface $request, ResponseInterface $response): ResponseInterface
    {
        $parsedBody = $request->getParsedBody();
        $name = '';

        if (is_array($parsedBody) && isset($parsedBody['name'])) {
            $name = trim((string) $parsedBody['name']);
        }

        $payload = [
            'message' => $this->greetingService->build($name),
        ];

        $response->getBody()->write(json_encode($payload, JSON_UNESCAPED_UNICODE | JSON_UNESCAPED_SLASHES));

        return $response->withHeader('Content-Type', 'application/json');
    }
}
config/container.php を更新します。
ここでは 6章で使う JsonErrorHandler の定義も先にまとめて登録しておきます。
実際にそのクラスが解決されるのは 6章で error middleware に渡すときなので、この段階の動作確認には影響しません。
<?php
declare(strict_types=1);

use App\Action\CreateGreetingAction;
use App\Handler\JsonErrorHandler;
use App\Service\GreetingService;
use DI\ContainerBuilder;

return static function (ContainerBuilder $containerBuilder): void {
    $containerBuilder->addDefinitions([
        GreetingService::class => DI\autowire(),
        CreateGreetingAction::class => DI\autowire(),
        JsonErrorHandler::class => DI\autowire(),
    ]);
};
app/routes.php を更新します。
<?php
declare(strict_types=1);

use App\Action\CreateGreetingAction;
use Psr\Http\Message\ResponseInterface;
use Psr\Http\Message\ServerRequestInterface;
use Slim\App;

return static function (App $app): void {
    $app->get('/health', function (ServerRequestInterface $request, ResponseInterface $response): ResponseInterface {
        $response->getBody()->write(json_encode([
            'status' => 'ok',
        ], JSON_UNESCAPED_UNICODE | JSON_UNESCAPED_SLASHES));

        return $response->withHeader('Content-Type', 'application/json');
    });

    $app->post('/api/greetings', CreateGreetingAction::class);
};
route にクロージャではなく CreateGreetingAction::class を置くことで、Slim が container 経由で Action を解決できます。
GreetingService を分けると、HTTP 入出力とメッセージ生成責務を切り分けやすくなります。
詰まり時:
- JSON が読めない:
Content-Type: application/jsonとaddBodyParsingMiddleware()を確認 - DI 解決に失敗する:
config/container.phpの定義と名前空間を見直す
コードのポイント
① コンストラクタ注入と PHP 8 プロパティプロモーション(CreateGreetingAction.php)
public function __construct(private GreetingService $greetingService)
{
}
private GreetingService $greetingService はコンストラクタプロモーション構文で、プロパティ宣言と代入を 1 行にまとめる。DI コンテナが CreateGreetingAction を解決するとき、GreetingService も型ヒントを読んで自動注入される。
② DI\autowire() によるクラス登録(config/container.php)
    $containerBuilder->addDefinitions([
        GreetingService::class => DI\autowire(),
        CreateGreetingAction::class => DI\autowire(),
        JsonErrorHandler::class => DI\autowire(),
    ]);
DI\autowire() はコンストラクタの型ヒントを読んで依存を自動解決する。この定義があれば、Action / Service / Handler を new せずに container から取得でき、6章で使う JsonErrorHandler も同じ仕組みで解決される。
5. curl で成功系を確認する
ここで、成功系の 2 本を確認します。
php -S を起動した別ターミナルは、そのままにしておいてください。
まずは GET /health です。
curl -i http://localhost:8080/health実行結果例:
HTTP/1.1 200 OK
Content-Type: application/json

{"status":"ok"}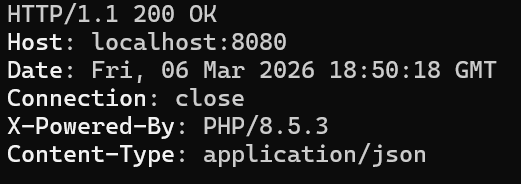
次に POST /api/greetings を確認します。
curl -i -X POST http://localhost:8080/api/greetings \
  -H 'Content-Type: application/json' \
  -d '{"name":"Taro"}'
実行結果例:
HTTP/1.1 200 OK
Content-Type: application/json

{"message":"Hello, Taro!"}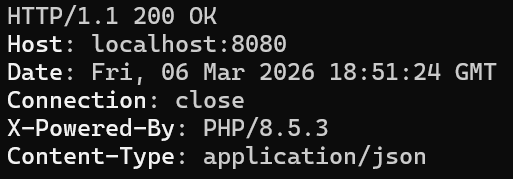
GET /health が通るなら、Slim の起動とルーティングまでは通っています。
そのうえで POST /api/greetings が通れば、Action -> Service の流れもつながっています。
詰まり時:
- 404 になる:
app/routes.phpとphp -Sの起動状態を確認 - レスポンス本文が空になる:
json_encode()の書き込みとContent-Typeを見直す
6. JSONエラーハンドリングを追加する
成功系だけだと、失敗時にどんな形式で返すかがまだ揃っていません。
ここでは name 未指定時と 404 を、HTML ではなく JSON で返すようにします。
まず src/Handler/JsonErrorHandler.php を作成します。
<?php
declare(strict_types=1);

namespace App\Handler;

use Psr\Http\Message\ResponseInterface;
use Psr\Http\Message\ServerRequestInterface;
use Slim\Exception\HttpBadRequestException;
use Slim\Exception\HttpMethodNotAllowedException;
use Slim\Exception\HttpNotFoundException;
use Slim\Psr7\Factory\ResponseFactory;
use Throwable;

final class JsonErrorHandler
{
    public function __construct(private ResponseFactory $responseFactory)
    {
    }

    public function __invoke(
        ServerRequestInterface $request,
        Throwable $exception,
        bool $displayErrorDetails,
        bool $logErrors,
        bool $logErrorDetails
    ): ResponseInterface {
        $status = 500;
        $message = 'Internal Server Error';

        if ($exception instanceof HttpBadRequestException) {
            $status = 400;
            $message = $exception->getMessage();
        } elseif ($exception instanceof HttpNotFoundException) {
            $status = 404;
            $message = 'Not Found';
        } elseif ($exception instanceof HttpMethodNotAllowedException) {
            $status = 405;
            $message = 'Method Not Allowed';
        } elseif ($displayErrorDetails && $exception->getMessage() !== '') {
            $message = $exception->getMessage();
        }

        $payload = [
            'error' => [
                'message' => $message,
                'status' => $status,
            ],
        ];

        $response = $this->responseFactory->createResponse($status);
        $response->getBody()->write(json_encode($payload, JSON_UNESCAPED_UNICODE | JSON_UNESCAPED_SLASHES));

        return $response->withHeader('Content-Type', 'application/json');
    }
}
次に src/Action/CreateGreetingAction.php を更新します。
name が空なら HttpBadRequestException を投げるようにします。
<?php
declare(strict_types=1);

namespace App\Action;

use App\Service\GreetingService;
use Psr\Http\Message\ResponseInterface;
use Psr\Http\Message\ServerRequestInterface;
use Slim\Exception\HttpBadRequestException;

final class CreateGreetingAction
{
    public function __construct(private GreetingService $greetingService)
    {
    }

    public function __invoke(ServerRequestInterface $request, ResponseInterface $response): ResponseInterface
    {
        $parsedBody = $request->getParsedBody();

        if (!is_array($parsedBody)) {
            throw new HttpBadRequestException($request, 'Request body must be a JSON object.');
        }

        $name = $parsedBody['name'] ?? null;

        if (!is_string($name) || trim($name) === '') {
            throw new HttpBadRequestException($request, 'name is required.');
        }

        $payload = [
            'message' => $this->greetingService->build(trim($name)),
        ];

        $response->getBody()->write(json_encode($payload, JSON_UNESCAPED_UNICODE | JSON_UNESCAPED_SLASHES));

        return $response->withHeader('Content-Type', 'application/json');
    }
}
最後に public/index.php を更新します。
default error handler を JsonErrorHandler に差し替えます。
<?php
declare(strict_types=1);

use App\Handler\JsonErrorHandler;
use DI\ContainerBuilder;
use Slim\Factory\AppFactory;

require __DIR__ . '/../vendor/autoload.php';

$containerBuilder = new ContainerBuilder();
(require __DIR__ . '/../config/container.php')($containerBuilder);
$container = $containerBuilder->build();

$app = AppFactory::createFromContainer($container);

$app->addBodyParsingMiddleware();
$app->addRoutingMiddleware();
$errorMiddleware = $app->addErrorMiddleware(true, true, true);
$errorMiddleware->setDefaultErrorHandler($container->get(JsonErrorHandler::class));

(require __DIR__ . '/../app/routes.php')($app);

$app->run();
addErrorMiddleware() だけでは、デフォルトで HTML エラー応答になることがあります。
setDefaultErrorHandler() で JSON ハンドラへ差し替えると、失敗時の返し方を API 向けに統一できます。
開発中は addErrorMiddleware(true, true, true) の第1引数を true にして詳細を見せ、本番では false にして抑制します。
詰まり時:
- 例外時に HTML が返る:
setDefaultErrorHandler()の呼び出し漏れを確認 - 500 になる:
JsonErrorHandlerの名前空間、config/container.phpの定義、ResponseFactoryの import を見直す
コードのポイント
① 例外の種別に応じたステータス振り分け(JsonErrorHandler.php)
        if ($exception instanceof HttpBadRequestException) {
            $status = 400;
            $message = $exception->getMessage();
        } elseif ($exception instanceof HttpNotFoundException) {
            $status = 404;
            $message = 'Not Found';
        } elseif ($exception instanceof HttpMethodNotAllowedException) {
            $status = 405;
            $message = 'Method Not Allowed';
        } elseif ($displayErrorDetails && $exception->getMessage() !== '') {
            $message = $exception->getMessage();
        }
instanceof で例外の種別を判定し、HTTP ステータスとメッセージを上書きする。Slim の HTTP 例外に該当しない場合はデフォルト 500 のまま返り、displayErrorDetails が true のときのみ詳細メッセージを出力する。
② 2 段階バリデーションで例外を投げる(CreateGreetingAction.php)
        if (!is_array($parsedBody)) {
            throw new HttpBadRequestException($request, 'Request body must be a JSON object.');
        }

        $name = $parsedBody['name'] ?? null;

        if (!is_string($name) || trim($name) === '') {
            throw new HttpBadRequestException($request, 'name is required.');
        }
ボディが配列でない場合と name が空の場合の 2 段階で検証する。HttpBadRequestException を投げると JsonErrorHandler が 400 として補足し、JSON 形式で返す。
③ デフォルトエラーハンドラの差し替え(public/index.php)
$errorMiddleware = $app->addErrorMiddleware(true, true, true);
$errorMiddleware->setDefaultErrorHandler($container->get(JsonErrorHandler::class));
addErrorMiddleware() が返すミドルウェアオブジェクトに setDefaultErrorHandler() を連鎖させる。この 2 行をセットにすることで、全例外が JsonErrorHandler を経由して JSON レスポンスになる。
7. 失敗系を curl で確認する
ここでは、name 未指定の 400 と、存在しないパスの 404 を確認します。
まずは name 未指定です。
curl -i -X POST http://localhost:8080/api/greetings \
  -H 'Content-Type: application/json' \
  -d '{}'
実行結果例:
HTTP/1.1 400 Bad Request
Content-Type: application/json

{"error":{"message":"name is required.","status":400}}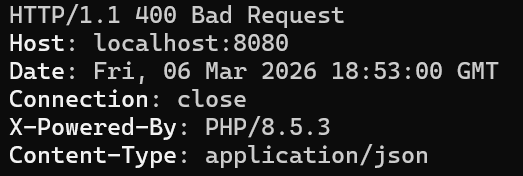
次に、存在しないパスです。
curl -i http://localhost:8080/not-found実行結果例:
HTTP/1.1 404 Not Found
Content-Type: application/json

{"error":{"message":"Not Found","status":404}}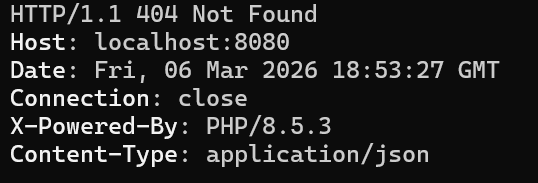
これで、成功系だけでなく失敗系も JSON 形式で揃いました。
最小 API でも、失敗時の返し方を先に統一しておくと、後続の API を増やしやすくなります。
詰まり時:
- 400 にならない:
CreateGreetingActionが更新後の内容になっているか確認 - 404 が HTML になる:
addRoutingMiddleware()とaddErrorMiddleware()の順序、default handler の差し替えを確認
8. まとめと次の一歩
本記事で、次の状態を達成しました。
- Slim 4 を最小構成で導入できる
GET /healthとPOST /api/greetingsを JSON で返せるAction -> Serviceの DI 構成を通せる- 400 / 404 も JSON 形式で返せる
起動不能になった場合は 3章へ、成功系の見直しは 5章へ、失敗系の見直しは 6章 / 7章へ戻って確認してください。
次の一歩:
- DB を追加して、永続化する JSON API へ広げる
- API キー認証やトークン認証を追加する
- PHPUnit で HTTP テストを書き、OpenAPI 記述へつなげる